Tag Archives: household

How to make a Dakota fire hole


My husband comes up with these great activities for the family to do.  When he said he was going to make a fire in a pit under the ground I thought he was strange.

333 117

But I have realized the wonderfulness of this type of fire. The Dakota fire hole is a great fire to make.  It is completely underground!  It has a low smoke output, no need to worry that smoke is blowing into your childrens’ faces, and I feel much safer having this type of fire when my children are roasting marshmallows over it.

Making a Dakota Fire Hole is initially more labor intensive than simply building a fire on the surface of the ground. However the outlay in energy required to make a Dakota fire hole is more than offset by its efficient consumption of fuel; it greatly reduces the amount of firewood required to cook meals.

When making this fire hole, you want to take notice of which direction the wind is blowing.  If it is blowing at an east to west movement, then you want your vent tube to be facing the east side

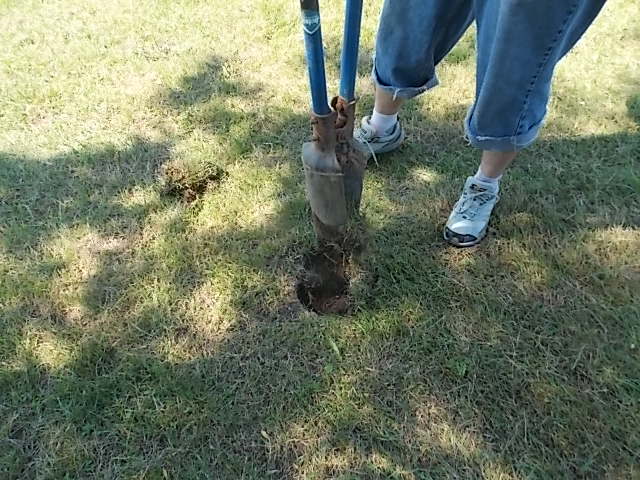
step one—removing the dirt and digging your pit.

To make a Dakota Fire Hole first remove a plug of soil about 12 inches in diameter and dig down one foot.
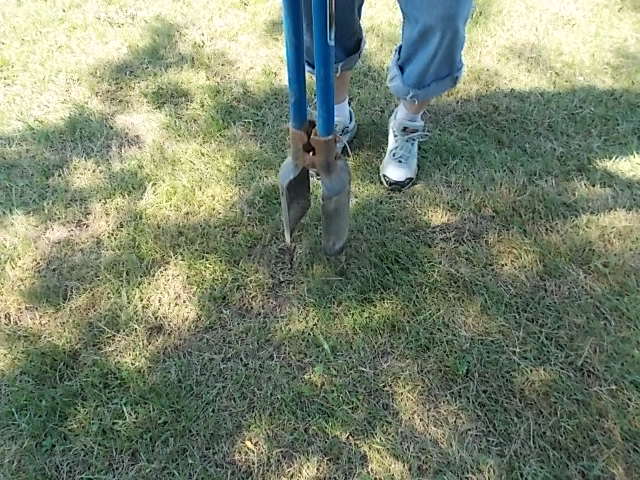
333 075 - Copy


keep digging….

333 076 - Copy


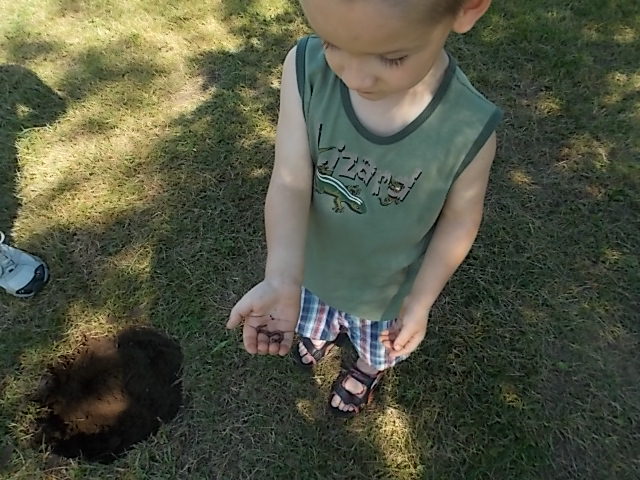
keep going…. Stop and give 3 year old some worms that you dug up.  Or save some for going fishing later with the family.

333 080 - Copy


Is your hole about 12 inches down??

333 083 - Copy


Step 2

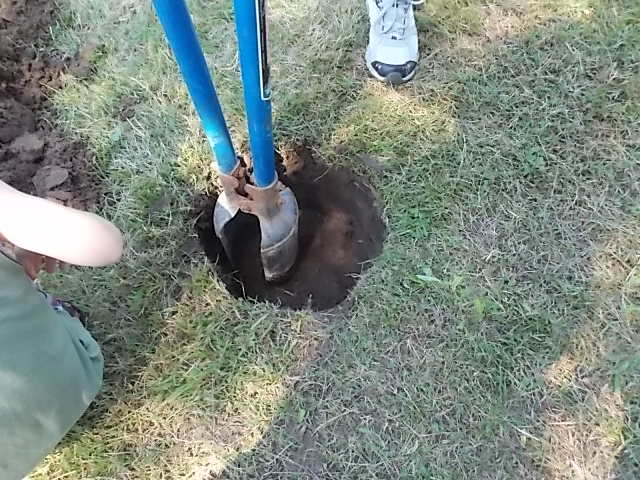
Making the Airway – Starting about one-foot away from the edge of the fire pit, dig a 6-inch diameter air tunnel at an angle so that it intersects with the base of the fire pit.
333 089333 092

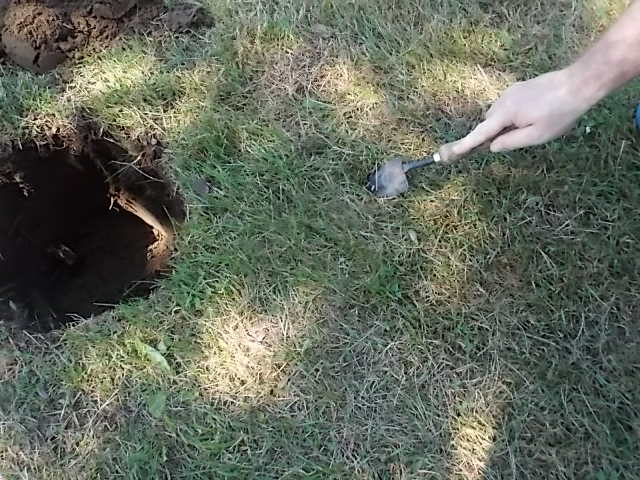
Can you see the spade of the shovel poking through?

333 096


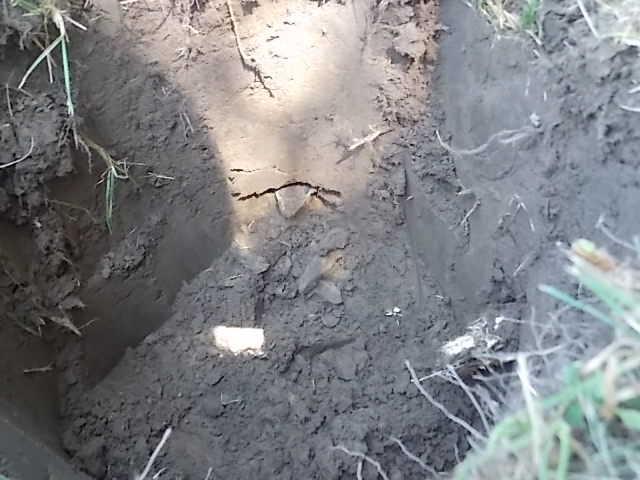
There it is, now clear out the mess that has gotten into the fire pit.333 098


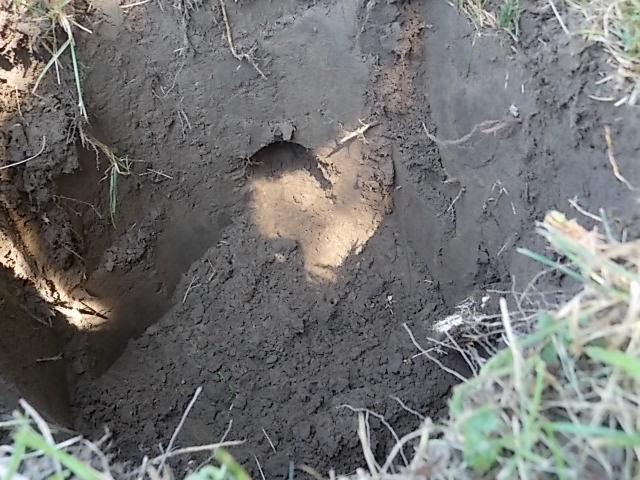
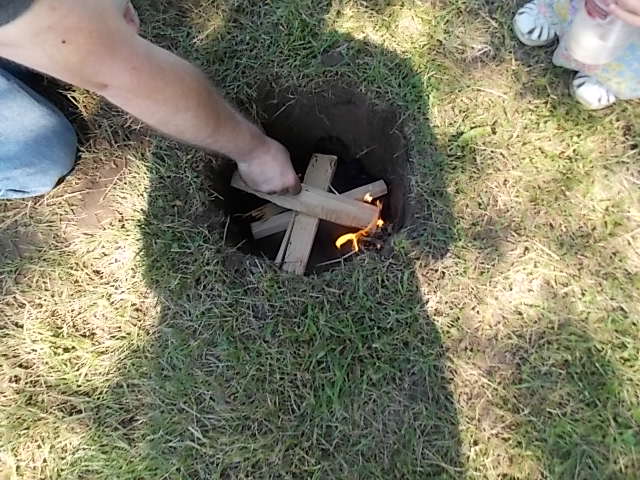
Now that your hole is dug , let’s make a fire

333 102

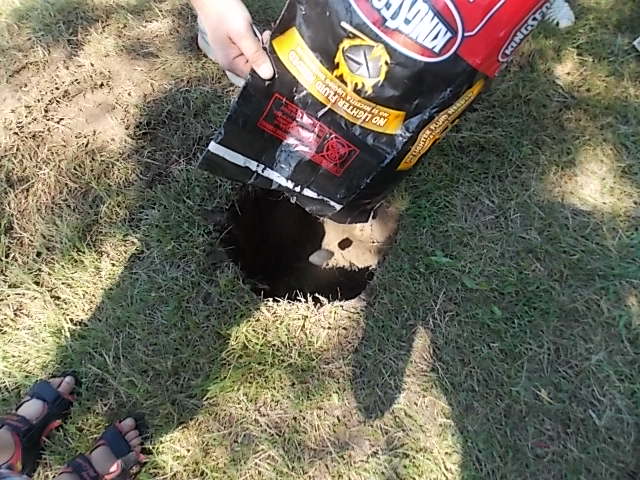
Add some charcoal….we really like the kind with the lighter fluid already coated onto the coals.

333 105

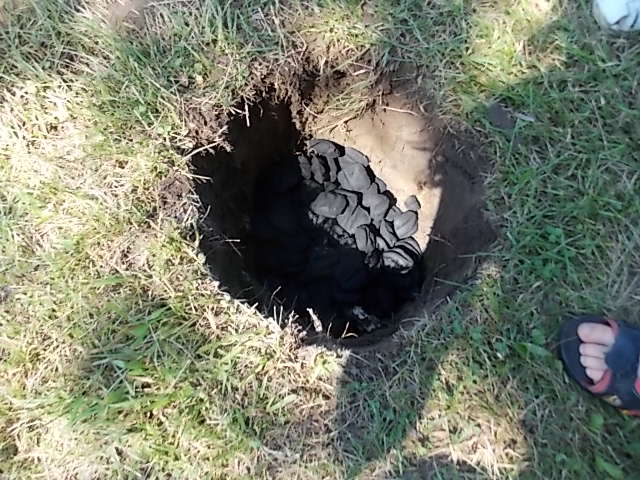
Add a small amount of kindling

333 107

Then light it up

333 109

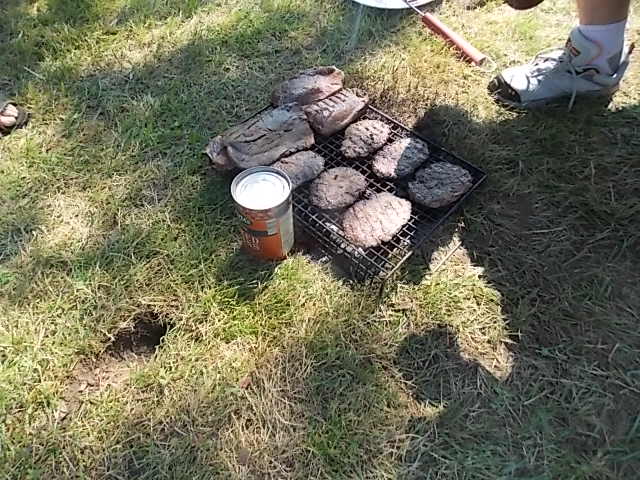
After your fire has been preheated you cook on this tonight.

Add an old oven rack to cover your fire and cook your items onto it.

333 115

For more information about how the dakota fire hole works click here.

333 116


21 days to a more natural home series—day 21 wrap up

all natural home series


We have completed this series.  I hope that you have made some of the changes in your home.  You don’t need to start big, just small baby steps.  If you just change one thing a week or even a month, it will be an improvement upon what you are doing now.

I know for our family personally this has been a huge money saver in our home.  I am constantly thinking that I need to wash that baggie out and save that plastic piece to reuse it.  I know the chemicals that I used before were costing us alot of money, making my own has made things much simpler and cheaper as well.  The only thing is that it takes some time making the cleaners.  I started making my all purpose cleaner and quadrupling it and putting it in an old water milk jug.  So that when i do run out, I don’t have to stop what I am doing and tend to mixing up another batch, now  I just pour directly from my gallon jug.  So much easier.

“I have been impressed with the urgency of doing. Knowing is not enough; we must apply. Being willing is not enough, we must do.” – Leonardo da da Vinci

21 days to a more natural home series part 18…natural air fresheners

all natural home series


I love burning a nice smelling candle in my home almost every night.  I never thought until recently are there toxins in what I am burning in my home??   That led me to a little research online and YES there are toxins in the candles I was burning.

So, what’s wrong with my candles?
According to a recent study by the U.S. Consumer Product Safety Commission (CPSC), 40 percent of candles on the market contain lead wires inside their wicks. Most often, the candles with lead wicks are scented candles. Fragrance oils soften the wax, so the manufacturers use lead to make the wicks firmer.

A candle with a lead-core wick releases five times the amount of lead considered hazardous for children and exceeds EPA pollution standards for outdoor air, says the CPSC. Exposure to high amounts of lead has been linked to hormone disruption, behavioral problems, learning disabilities, and numerous health problems.

So what can we do with all of that??  First of all, ensure that any new candles you purchase don’t have lead in the wicks. Look for a “lead free” label, or perform the “No-Lead Test”.

  1. Look for a “lead-free” label when shopping for new candles.
  2. For unburnt candles, rub the tip of the wick on a piece of paper. If it leaves a gray mark, like a pencil, the wick contains a lead core. If you’ve already purchased the candle, take it back to the store and tell the manager why you’re demanding a refund.
  3. For candles that have already been burned, you should just throw out any that have metal cores as a precaution. Simply look at the tip of the wick and see if it has a metal core. If you still can’t tell, peel back some of the cotton.

Now if my candles are bad, what else can I do to “naturally” freshen my home??

  • Keep the odors down in your household.  Keep trash cans emptied, throw diapers outside in the trash, wipe up and disinfect “smelly” areas, and keep pet smells under wraps.
  • Give your household a good old fashioned open window policy. Nothing is better than fresh air flowing through your household.
  • If your kitchen is smelly from cooking fish say…..boil some vinegar on the stove or in your microwave.  It will take away the smell.
  • Set a pot on your stove with water and some spices and simmer for a few hours.  I like to do cinnamon, nutmeg, and ginger.  Or use vanilla or almond extract.  You can boil cut up oranges and lemons as well.  Experiment with different spices to give a great quick scent.   Be sure to keep the water level in your pan as to not burn it.
  • A few drops of essential oils dropped in different areas helps with scent controls.  Or you can mix it with some water and alcohol in a spray bottle and in the air.

You want to avoid all the “heavy-strong” smelling factory made air fresheners.  Most all contain carcinogens.  Look at part 2 of this series for links to the Cancer Prevention Coalition website that lists many products that contain these harmful substances.  They cause many harmful side effects as well.  Even though they smell so great, you want to avoid all those chemical laden product, for the safety of your children and yourself.

Look for part 19…how to repel bugs naturally

21 days to a more natural home series part 16…wipes

all natural home series


Convenience that is the name of what we want nowadays.  We want convenient foods, convenient people, and definitely our cleaning to be convenient.  So what if it is more of a pain to drag out the spray bottle and paper towels to clean up our messes all of the time??  What if we didn’t want to get a washcloth wet every time we changed the babies bottom??The answer is wipes.

It is so easy to make your own cleaning wipes at a fraction of the price of store bought ones.  All it takes is some time and creativity to make some.

There are numerous ways you can do this. You will need good sturdy paper towels.  I would recommend Bounty, for the extra cents it costs the quality will be better and easier to rip apart.

We then need to decide which type of container you are going to be using for storing the wipes in.

Option 1:  You can take an old wipey box and unroll and fold paper towels to neatly fit inside your container, would probably take awhile and I know would drive me crazy.  images

Option 2:  You can take a roll of paper towels and cut in half with either a sharp serrated knife, an electric knife,  or use a band saw to easily do the job.  images (2)

Then place them in a smaller plastic container.  You can use numerous containers— ice cream buckets, large coffee cans with lids, or regular plastic tupperware containers.images (1)

Option 3:  Get a roll of paper towels, and find a container that it will fit into and you will have no need to cut or fold your wipes.  I believe they will fit in a large reusable store bought wipe container.

download

I gave all the options I knew of because it all is going to depend upon what size container you have to put them in. If you have the money save some heartache and go buy a store bought wipe container and use it up and then start making wipes from it next month:).

For your type of wipes you can make all sorts.

  • cleaning wipes—using our all natural all-purpose spray solution.  Just pour over top of the wipes and you are ready to use them.
  • baby wipes–2 cups distilled water–or boiled then cooled
    1 tablespoon castile soap (or other natural, mild soap)
    1 tablespoon aloe vera gel
    1 tablespoon witch hazel extract
    1 tablespoon sweet almond oil (or olive oil)
    10-15 drops essential oils of choice (optional)
    combine above and pour over your paper towels.  You may have to invert the container a few times to make sure that the towels get completely wet.
  • window cleaning wipes.  Pour in the all natural window cleaner solution and you have instant wipes.
  • makeup remover wipes.  Just cut your paper towels into a smaller size and use like a sour cream container to store these in. 2 cups of distilled water–or boiled then cooled, 2 tablespoons of coconut oil, and 2 squirts of castile soap.

This is just one way to start making those small steps from convenience to homemade.  The more steps you take the more you are on your way to a more simplier and plainer lifestyle.

21 days to a more natural home series part 13…dishwasher detergent

all natural home seriesWe prefer to do our dishes manually by hand but if you use your dishwasher, know that on the back of your box of detergent are some pretty strict warnings.  How many of us accidentally drop a few grains of dishwashing crystals onto the floor and then have our crawling babies get it on their hands?    It is highly toxic and the box recommends we don’t even breathe it in.  But we are going to wash our dishes where all our food and drinks touch and then enter our bodies???  Doesn’t sound right.

Here is an alternative that is safer to use. Mix the following into a bowl.

  • 1 cup borax
  • 1 cup washing soda
  • 1/2 cup citric acid–found in the canning section
  • 1/2 cup kosher salt (for scrubbing action)
  • optional– essential oils,  10 drops of orange

111

Use 1 Tbsp per load.  Even when the detergent opening is larger and will fit more into it, on the back of your “store bought detergent” it recommends using 1 Tbsp only, save your money and use the correct amount.

The citric acid will cause your mixture to “clump.”  If you leave your mixture out on the counter for a few days that will disappear.

For rinsing aid, use straight vinegar .

Are you reducing the amount of chemicals you bring into your home?  Start on day 1 of this series and see why it is so important to remove as much as possible toxic chemicals and cleaners in your home.