Category Archives: Household

Everything and anything relating to the household structure.. From organization, living frugally, natural living, or fun ideas for families.

21 days to a more natural home series….part 20…..tips

all natural home series
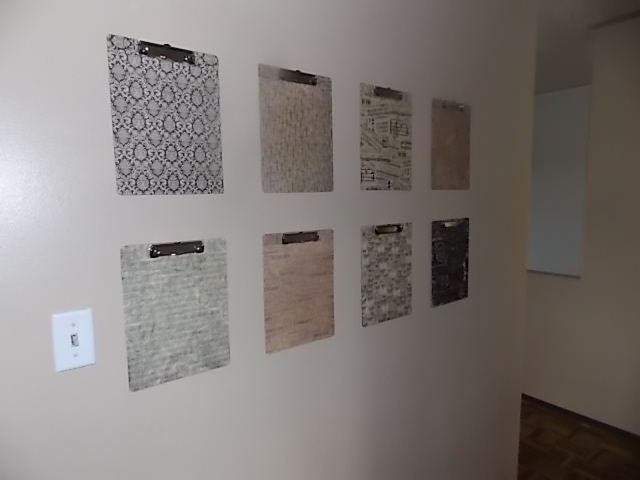
In todays post I have some miscellaneous tips that you can do to make your home more natural.

  • Want to improve your air quality in the home?? Get an aloe plant.  This easy-to-grow, sun-loving succulent helps clear formaldehyde and benzene, which can be a byproduct of chemical-based cleaners, paints and more. Beyond its air-clearing abilities, the gel inside an aloe plant can help heal cuts and burns.  Great for those that are “non-green” thumb.
  • Take off your shoes at the door.  Shoes track into the home all sorts of toxins from the outside that could impact your indoor air quality.
  • Get an air purifier to help clean your air.  Do some research online to find a good quality one.
  • How about a natural approach and OPEN YOUR WINDOWS.  Nothing is better than good ol fresh air.
  • Make the switch to cast iron or anodized aluminum cookware when it’s time to replace your old pots and pans. Prioritize replacing the cookware used over high heat and pieces that are scratched. PFCs, are used in non-stick cookware. They may keep food  from sticking, but they stick around in the environment and the body for a long time.
  • Avoid  Bleached Products.  Some paper products are often bleached to make them whiter, choose toilet paper, tissue and office paper labeled “Processed Chlorine Free” (PCF). Look for unbleached coffee filters and organic, unbleached tampons as well.
  • Replace plastic water bottles with a refillable stainless steel version, or to replace plastic toy blocks with wooden ones, plastic teething chews with organic cotton, or plastic jars with glass.
  • To select the plastics that are best for your children and for the environment, get to know the easy-to-identify plastic recycling codes you’ll usually find on the underside of the bottle or packaging. Look for these numbers and symbols before you buy. The safer plastic choices are coded 1, 2, 4, and 5. Try to avoid 3, 6, and most plastics labeled with number 7.


21 days to a more natural home series…part 19…natural bug repellent

all natural home series


Bugs, bugs, and more bugs.  The one thing I detest about warmer weather is the mosquitoes and ticks that we have around here.    The last few years we have been pretty much mosquito free in our area, but we have dealt with ticks.  Nothing worse than seeing a small tick on your babies head or behind their ears.  Makes me shutter, yuck!

For the most part, I try to thoroughly check my children as best as I can when we come inside, (checking 6 little ones, is not always at the top of my list, sorry to say).  Sometimes a little preventative maintenance is the best thing to do.

I do not like commercial brand bug and tick spray.  The chemicals inside the spray I know are not healthy for myself nor are they good for my children.  But what is worse…getting bit by the bugs and possibly getting a disease, or using the chemicals in the bug spray??  That is a question you are going to have to ask yourself.  I will try multiple natural remedies before I will just grab the commercialized product.

Here are a few options for keeping mosquitoes and ticks at bay.  Why are there multiple recipes?? Because different types of environments, bugs, and people will respond differently to these remedies.  Find which works best and stick with it.

  • Nutritionally, you can drink a tablespoon or two of organic apple cider vinegar and eat lots of garlic. Vitamin B1 taken daily is also supposed to help repel insects.
  • Rub vanilla extract directly onto the skin. You can also mix vanilla with witch hazel and water for a spray version.
  • Rub lavender flowers if you have them or lavender oil on your skin.  Pay attention to the “hot parts” of your body like your neck, and underarms.
  • Rub fresh or dried leaves of anything “mint” all over your skin to repel insects.  (peppermint, spearmint, catnip, citronella, basil, or lemongrass are all good choices.)
  • tea tree oil mixed with water in a spray bottle might do the trick.
  • In a 4 ounce spray bottle add 1/3 cup of witch hazel, then add to it all or some of the following essential oils(I recommend 10-25 drops of each)———– lemongrass oil, eucalyptus oil, lemon oil, citronella oil, or cedar oil.

Do you have any ways of “naturally” keeping mosquitoes and ticks at bay??

Wall hanging clipboards… creative, clean, cheap, and organized

For those that do not know me personally, I don’t like clutter.  I watched the show “Hoarders” and it made me cringe.  I don’t like stuff.  Too much of it is such a waste.  You will find me cleaning and weeding out my house 3-4 times per year.  Having a large family, I find that things do accumulate and unfortunately things do get messy most of the time.  I try and be organized but I realize that there is always room for improvement.

Well this past spring I went through and painted our entire house.  It has been 5 years since we have moved into our home and we painted the rooms when we did move in.  But with 10 children, walls get scratched, paint gets dull it was time to freshen up the place.  For about $100 I was able to repaint our entire house.  I decided to go with a more neutral color this time around, the first time I used lots of colors and then found when I needed to touch up something, my paint was usually gone and I didn’t want to go spend $20 for a new can.  This time I used the same color in multiple rooms of the home and it has given it a nice neutral, warm feeling.  I went with browns–dark brown for the trim, and a lighter tan colored for the walls.  Anyways with all that new paint, I decided to redo my wall decorations.

I haven’t had much on the walls, because I have had so many little children in the last few years, who has time to decorate their house when they barely have time to get a shower each day.  Well this year things are seemingly getting easier, my youngest is 1 now and life does get better.

I found that within my day, I write multiple to do lists and have different notes and papers for the children.  I was so tired of having them all over my counter space in the kitchen.  I decided to make these clipboards to hang on the walls, out of the way.

DSCN2668

Each clipboard is designed for each person that needs a note.  I have one for 8 of my children, as the littlest ones do not need one yet.  It was so simple to make and cheap too.  I put it together in an afternoon.

For the project you will need

  • a bottle of modge podge $8 –I used about 1/3 of the large bottle
  • clipboards to hang $1
  • scrapbook paper to cover the boards $.25 on sale at Hobby Lobby

DSCN2637First you need to cut a pattern out of your paper.  I lined it up to the clipboard and cut out the rectangle to fit.  Then made a pattern to see how to cut the top to fit.  DSCN2638I put the Modge Podge in a bowl and wiped a layer onto the clipboard.DSCN2639Cover it completelyDSCN2640I then put the top piece of paper on and smoothed it.  DSCN2641I then put the large square piece to fit the bottom.  I had to put some more Modge Podge at the top over the fitted piece.DSCN2642Smooth out the wrinkles as best as you can.  I found the lighter scrapbook pages did bubble up and show a little more than the darker colored ones.  When the Modge Podge has completely dried, about an hour, turn the clipboard over and trim the excess paper with small pair of scissors or a very sharp exacto knife.DSCN2643Then apply 3 coats of Modge Podge onto the top of the clipboard.  Let them dry in between coats, I did them about one every hour.DSCN2645Then when completely dry, overnight, I hung them up.  How do you hang up something that has no hook?? Velcro. I applied 3 small squares to each  clipboard and stuck them to the wall.  Genius.

DSCN2668

21 days to a more natural home series part 18…natural air fresheners

all natural home series


I love burning a nice smelling candle in my home almost every night.  I never thought until recently are there toxins in what I am burning in my home??   That led me to a little research online and YES there are toxins in the candles I was burning.

So, what’s wrong with my candles?
According to a recent study by the U.S. Consumer Product Safety Commission (CPSC), 40 percent of candles on the market contain lead wires inside their wicks. Most often, the candles with lead wicks are scented candles. Fragrance oils soften the wax, so the manufacturers use lead to make the wicks firmer.

A candle with a lead-core wick releases five times the amount of lead considered hazardous for children and exceeds EPA pollution standards for outdoor air, says the CPSC. Exposure to high amounts of lead has been linked to hormone disruption, behavioral problems, learning disabilities, and numerous health problems.

So what can we do with all of that??  First of all, ensure that any new candles you purchase don’t have lead in the wicks. Look for a “lead free” label, or perform the “No-Lead Test”.

  1. Look for a “lead-free” label when shopping for new candles.
  2. For unburnt candles, rub the tip of the wick on a piece of paper. If it leaves a gray mark, like a pencil, the wick contains a lead core. If you’ve already purchased the candle, take it back to the store and tell the manager why you’re demanding a refund.
  3. For candles that have already been burned, you should just throw out any that have metal cores as a precaution. Simply look at the tip of the wick and see if it has a metal core. If you still can’t tell, peel back some of the cotton.

Now if my candles are bad, what else can I do to “naturally” freshen my home??

  • Keep the odors down in your household.  Keep trash cans emptied, throw diapers outside in the trash, wipe up and disinfect “smelly” areas, and keep pet smells under wraps.
  • Give your household a good old fashioned open window policy. Nothing is better than fresh air flowing through your household.
  • If your kitchen is smelly from cooking fish say…..boil some vinegar on the stove or in your microwave.  It will take away the smell.
  • Set a pot on your stove with water and some spices and simmer for a few hours.  I like to do cinnamon, nutmeg, and ginger.  Or use vanilla or almond extract.  You can boil cut up oranges and lemons as well.  Experiment with different spices to give a great quick scent.   Be sure to keep the water level in your pan as to not burn it.
  • A few drops of essential oils dropped in different areas helps with scent controls.  Or you can mix it with some water and alcohol in a spray bottle and in the air.

You want to avoid all the “heavy-strong” smelling factory made air fresheners.  Most all contain carcinogens.  Look at part 2 of this series for links to the Cancer Prevention Coalition website that lists many products that contain these harmful substances.  They cause many harmful side effects as well.  Even though they smell so great, you want to avoid all those chemical laden product, for the safety of your children and yourself.

Look for part 19…how to repel bugs naturally

Roasting marshmallows…..

DSCN2624

We had a great weekend, as we usually do, lots of time spent outside playing t-ball with the children, having a BBQ, swimming–usually but it is only 68 degrees for August:(, and then we have a fire to roast marshmallows for a nice fun wind down to our day.

We have always used the regular type cylindrical marshmallows, but this time we used the flat square ones.  They worked so wonderfully.  I don’t know if my children all of a sudden became experts at toasting marshmallows, because they almost always burn them, but these didn’t burn as quickly.  They turned a nice roasted brown color and then didn’t puff up and make a mess.  A nice “clean” roasting marshmallow so to say.DSCN2625Definitely something to try next time you think of roasting marshmallows with your children.  
DSCN2622