
Large family organization tips part 7 the little boys room/family closet
In part 7 of our series, large family organization tips, we are going to look into the little boys room/family closet.
In our household this is how the rooms are broken down:
- teenage girls in the basement
- 2 teenage boys in a room
- four girls ages 2-8 in a room
- two boys ages 1 and 3 in a room
- Mom and Dad in a room
It wasn’t always like this, in the last 5 years of living in this home, we have moved children from one room to the next as they went through different ages and stages. Sometimes we would have a new baby and a 1 year old who wasn’t quite ready for their own room, so they bunked with Mom and Dad. Sometimes we had a 2 and 3 year old that would not sleep well in a room because one would constantly wake up during the night and get the other one up and Mom still had to get up with a nursing baby. Sometimes it was because of the amount of space that we needed to fit certain bed types. Sometimes it was because older kids were tired of crying little ones in their rooms. It was a constant move, but I think we have finally arrived at where we are going to be at for now. Well actually with Daddy’s amazing beds, there is no chance of moving those big sturdy beds, gonna have to stay put.
The little boys room has become the younger half’s closet room as well. This was the original room when I had 4 children under 4. They would all sleep in here and so naturally we just kept all the clothing in here. It was easier for me to be able to have a central location to put everything away.
One thing you will notice about our closets is that there are no doors. When we moved into our rental home they had louver doors. We had many little ones and I did not want to risk a pinched finger, we took them all off and stored them in a shed. I know for some it would be better to have a covered closet, but for me I just look past it and look at it as functionality.
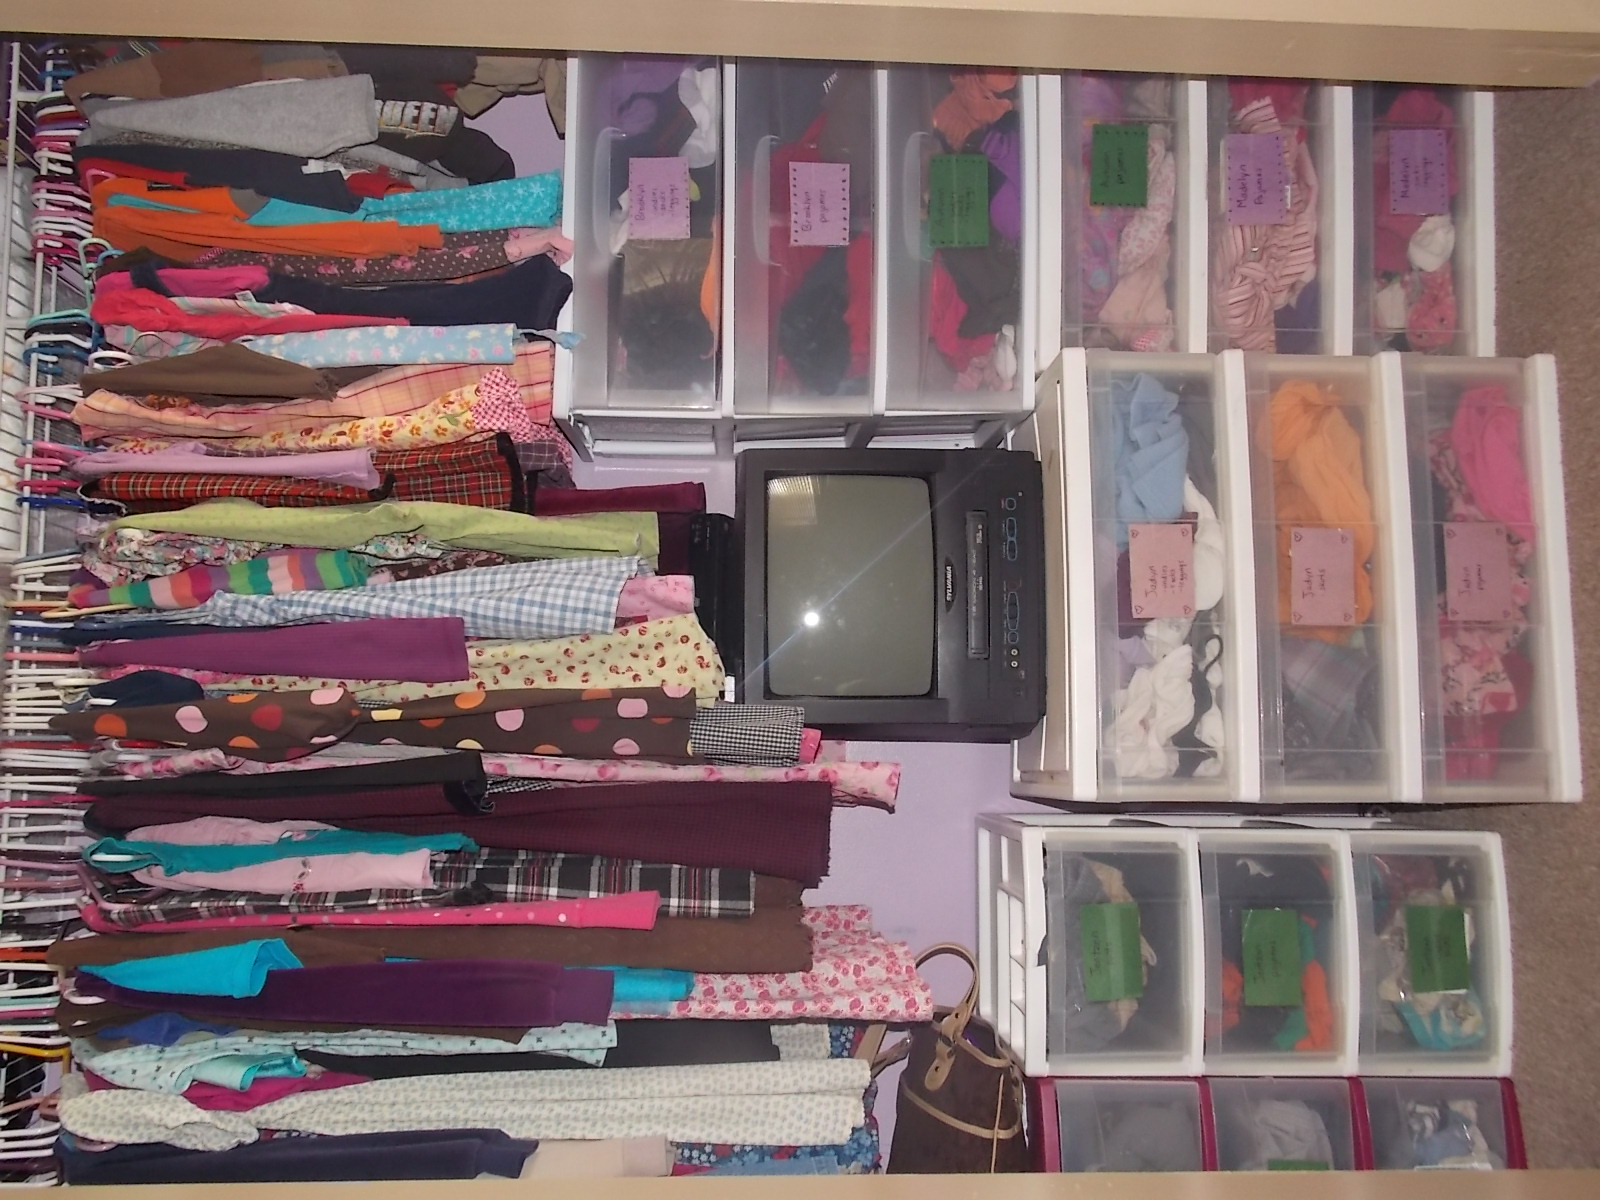
Our girls only wear dresses or skirts so that is easy to hang all of their clothing. I try and have at least 6-10 outfits for each child. At least 2-3 nice church dresses and 6-7 play outfits. Sometimes we have more or less depending upon the availability at Goodwill. I hang the completed outfit and if it is a skirt/shirt combo that goes on one hanger. Much easier than digging through drawers looking for a shirt and skirt combo. Same for boys clothing if it is overalls or church clothing, I hang shirt and pants together. Everyday boys pants go in a drawer and shirts hung up. Same ratio for boys clothing 6-7 everyday shirts and pants and 2-3 church outfits. We hang oldest on left to youngest on the right.
Each child gets a set of drawers as well. Each drawer is labeled to help others, who are not as familiar with the clothing situation to find things easily, aka Daddy. Unfortunately my drawers are not neatly folded. I find that someone, sometime during the day will go through these drawers looking for things and mess up all my folding. I have found that I can usually find what I need in that small drawer quite quickly even if it is not folded. So I take one more thing off of my plate and don’t worry about folding their clothes that go in drawers. I am talking about pajamas, socks, and underwear. I do fold the girls leggings and the boys pants. But that is it.
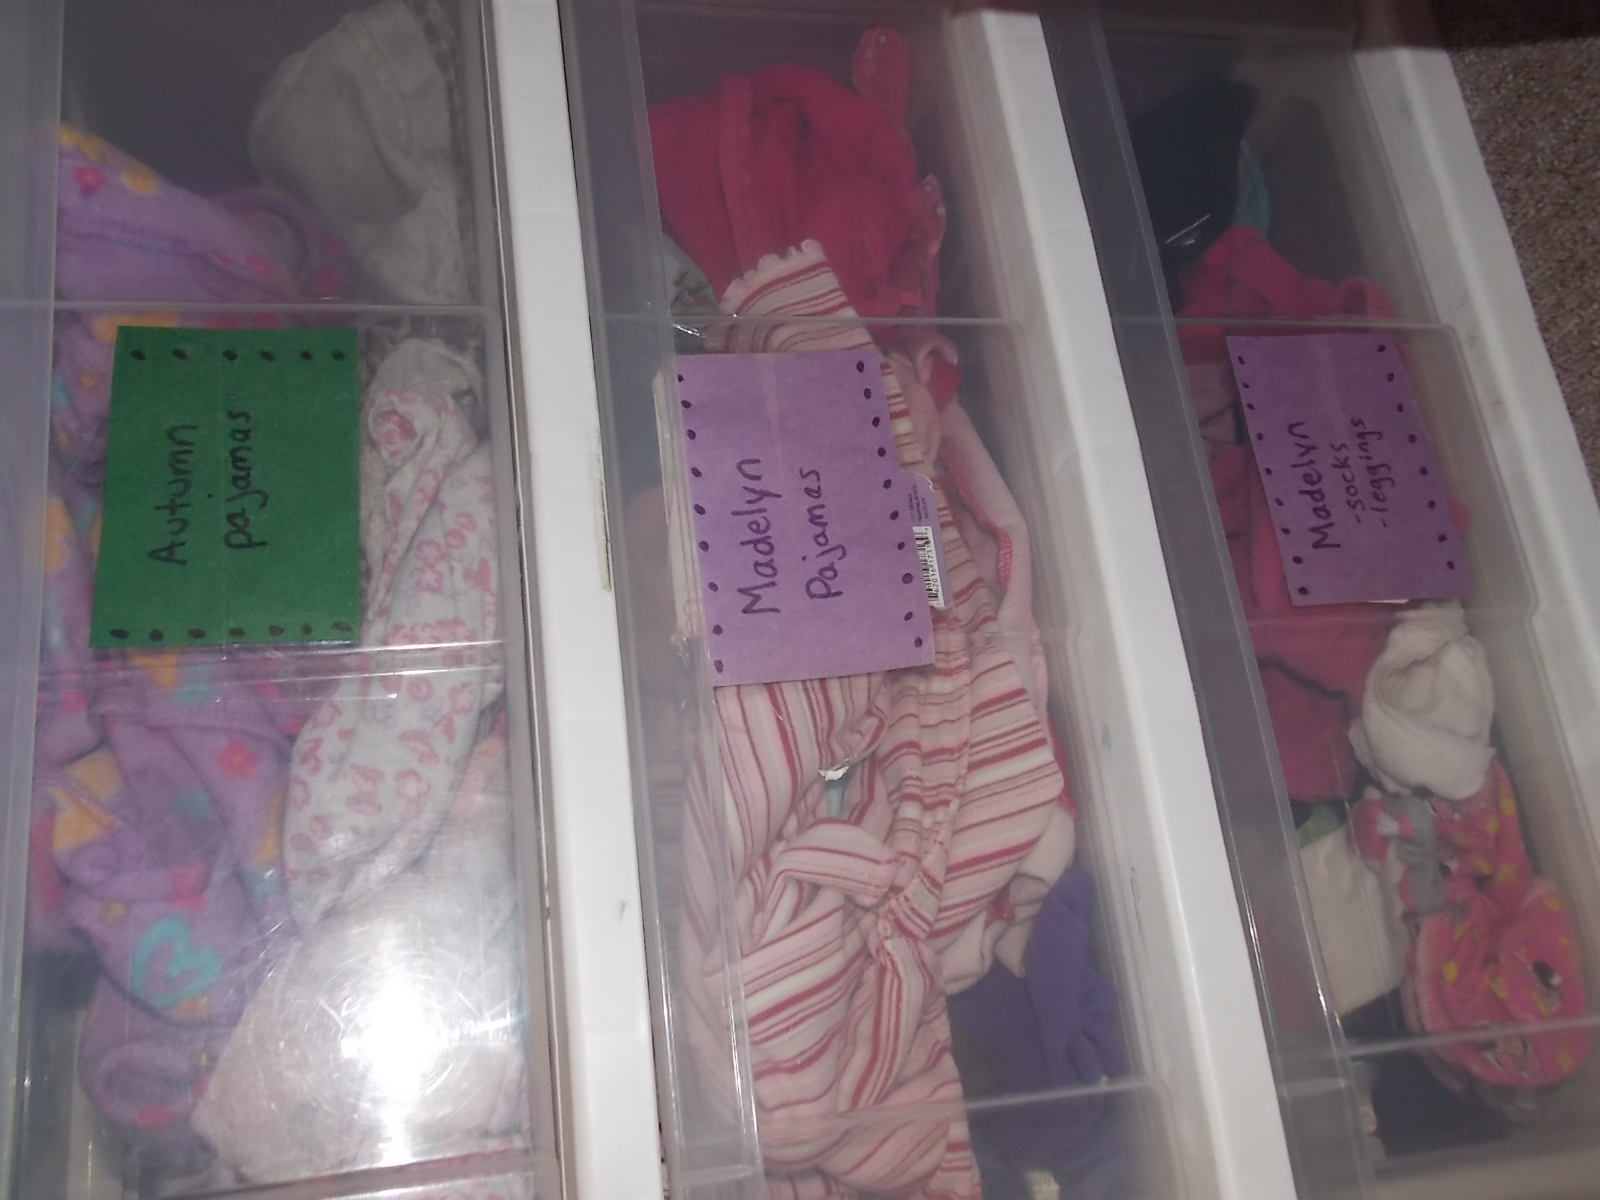
For the girls:
I do a drawer for pajamas
- footy pajamas
- gown pajamas
- large t shirt used for pajamas. I find that is easier than trying to search for matching pajama sets at Goodwill. I just grab a couple of cute larger t-shirt and then they wear their leggings for pants.
I like to make sure that they each have at least one pair of footy pajamas and 4 t-shirts or gowns. We try and wear our pajamas more than once to cut down on laundry.
A drawer for under garments, like:
- undies
- socks
- leggings
At the start of each clothing season—- fall/winter and spring/summer I make sure and buy each child a package of underwear and new socks. With many girls close in age, I try and get different colors of undies and different styles of socks for each girl. One might prefer crew cut socks, another ankle socks. For underwear they usually have same prints for different sizes, I try and get different brands so that I can tell them apart. I just buy the briefs for all of them— one brand had neon ones, and another had flower prints. It makes it easier at laundry time, as it is hard to tell whose are whose.
I make sure they have 5-7 pairs of legging pants. We don’t do tights as I found my girls don’t really like to wear them as they get older, they would always get a hole in them, and they were really hard to put on. Have you ever tried to dress four little girls with tights??? I switched to pant leggings, much easier.
For the boys:
I do a drawer each for:
- pants
- pajamas
- socks and underwear
Boys are easy, a package of underwear and socks and they are good to go. I try and have 7 pairs of pants, dress and sweat, because I know boys, and they will ruin a few of those over the next few months. I try and keep my church pants separate hanging up, otherwise they will be wearing pants to church that have grease stains on them. Boys clothing does not last.

We do not keep out of season clothing in these closets. I have designated plastic bins downstairs for those. Whenever someone gives us a bag of donated clothing, I go through the bags, separate into piles of which size child it will fit, make sure it is clean, and then put in bins downstairs. I throw ripped or stained clothing out in the garage and my husband and son use it for rags. The only clothing item that I do keep out is their bathing suits. I store these in a cloth bag on top of the closet in case we are invited to a swim birthday party during the winter months.
On top of the closet, which is not pictured, I keep extra packs of diapers—even though I use cloth, I buy disposables for when we go out. Much less bulky and easier when you have many little ones in diapers.
Oh and the tv is in the closet, huh weird spot right?? Well the story was when we had 4 little ones, This room was pretty packed with cribs and toddler beds, I didn’t really have a place to put a tv. The room was full of beds and toys at the time, no furniture to hold a televsion. So we put it in the closet, its been a good place, out of the way. Don’t think because every room has a tv that we watch a lot of it. I have found that if they can unwind from the day in their rooms before bed with a dvd or video , it is a good thing.
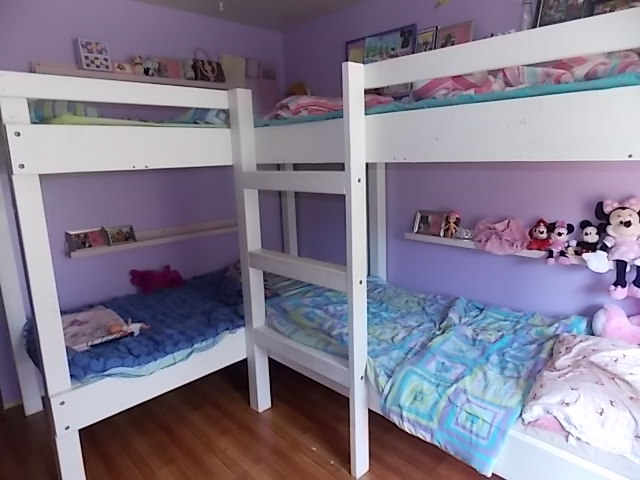
For the room….it is simple. This group of boys is little(ages 1 and 3), we have no need for any heavy duty built beds yet. I just repainted one of the older boys bunk beds with the same paint I did my trim with and made it look all new again. The 1 year old sleeps in a pack and play which is not pictured. I did away with cribs,after I realized how much space they took up. The playpen fits the same purpose with much less space. I found a thicker mattress pad at Goodwill to make it more comfortable to sleep on.
We decorated the walls with vinyl cling on stickers in Lightning Mc Queen because I know their choice will change over the next few years.
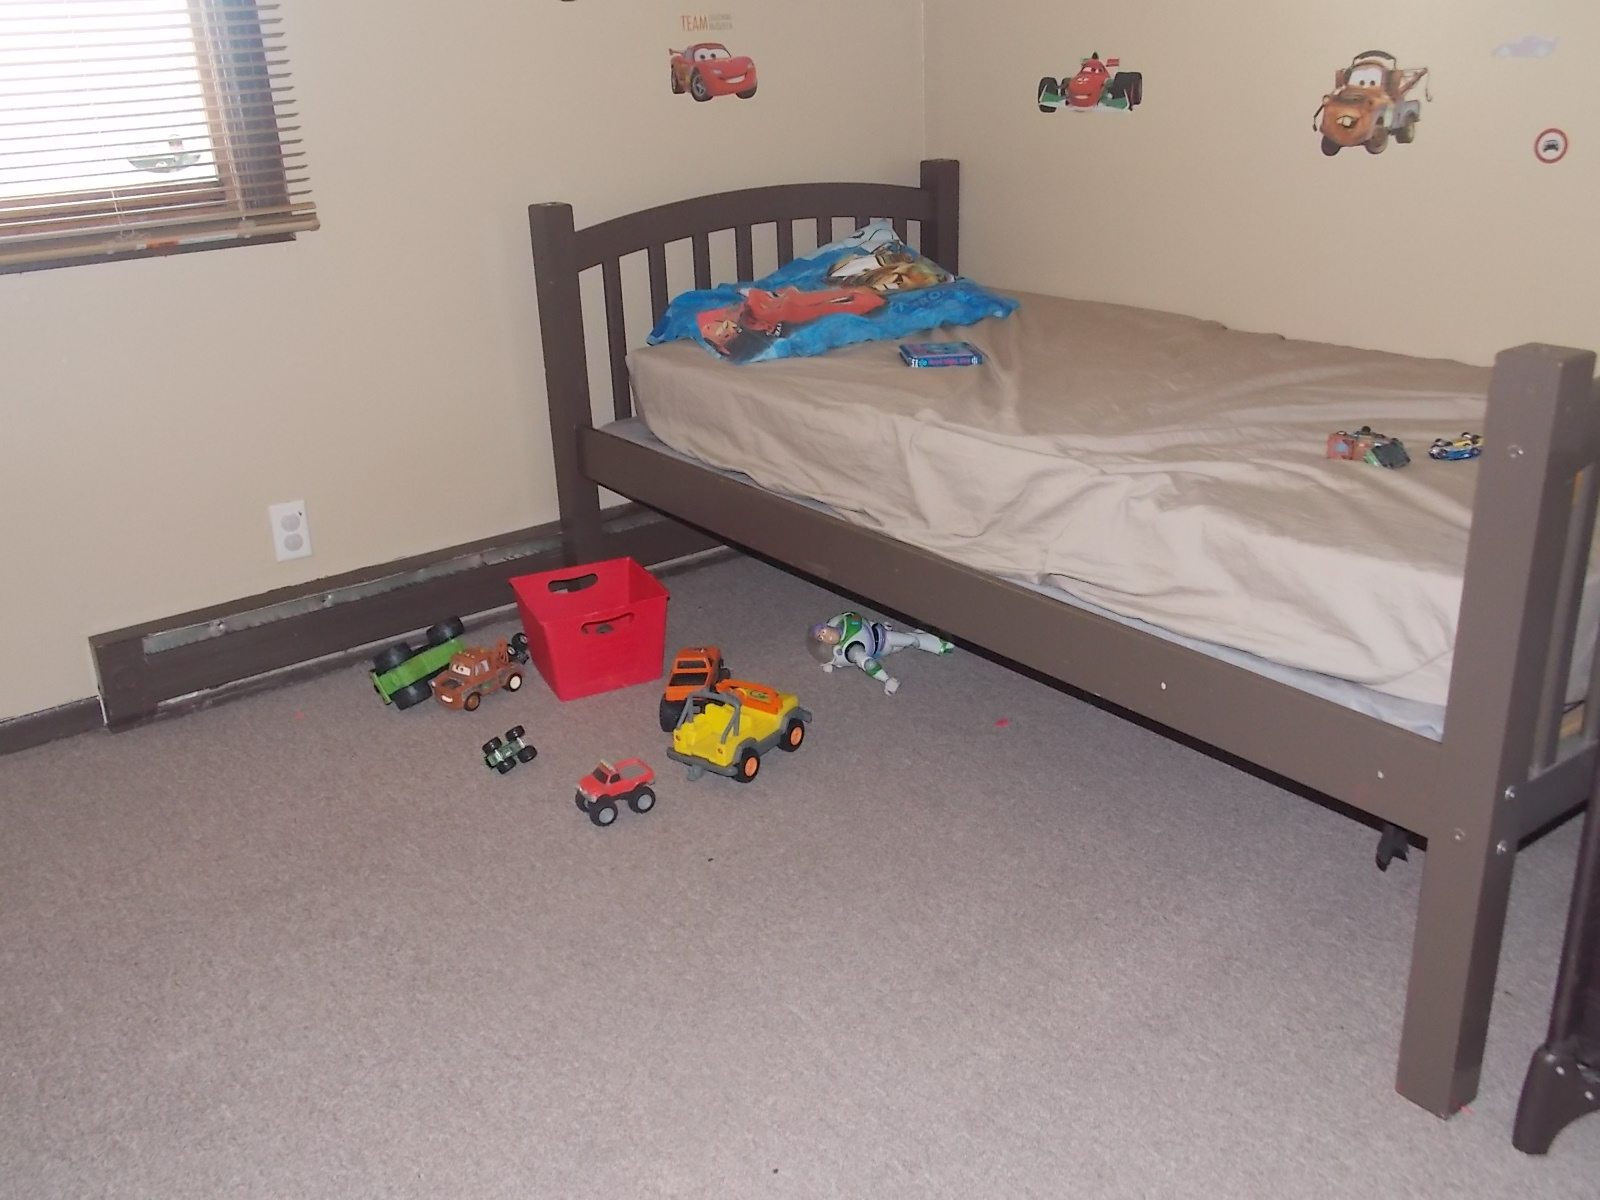
I don’t keep toys in rooms as it is just constant work keeping it clean, however I do have that red bucket you see pictured, that I let my 3 year old keep his stash of cars in. He enjoys playing in his room,and it is a nice quiet get away place for him to unwind during the day. He likes to pull out his trucks and play. I keep a couple of the other larger trucks pulled under his bed as well. These are toys he likes to play with each and everyday. If he doesn’t play with it regularly I take it out. We store these toys somewhere else. Just the basics in the rooms. Plain and simple.
Up next …the master bedroom